Monday, April 9, 2012

Banner Bandwagon

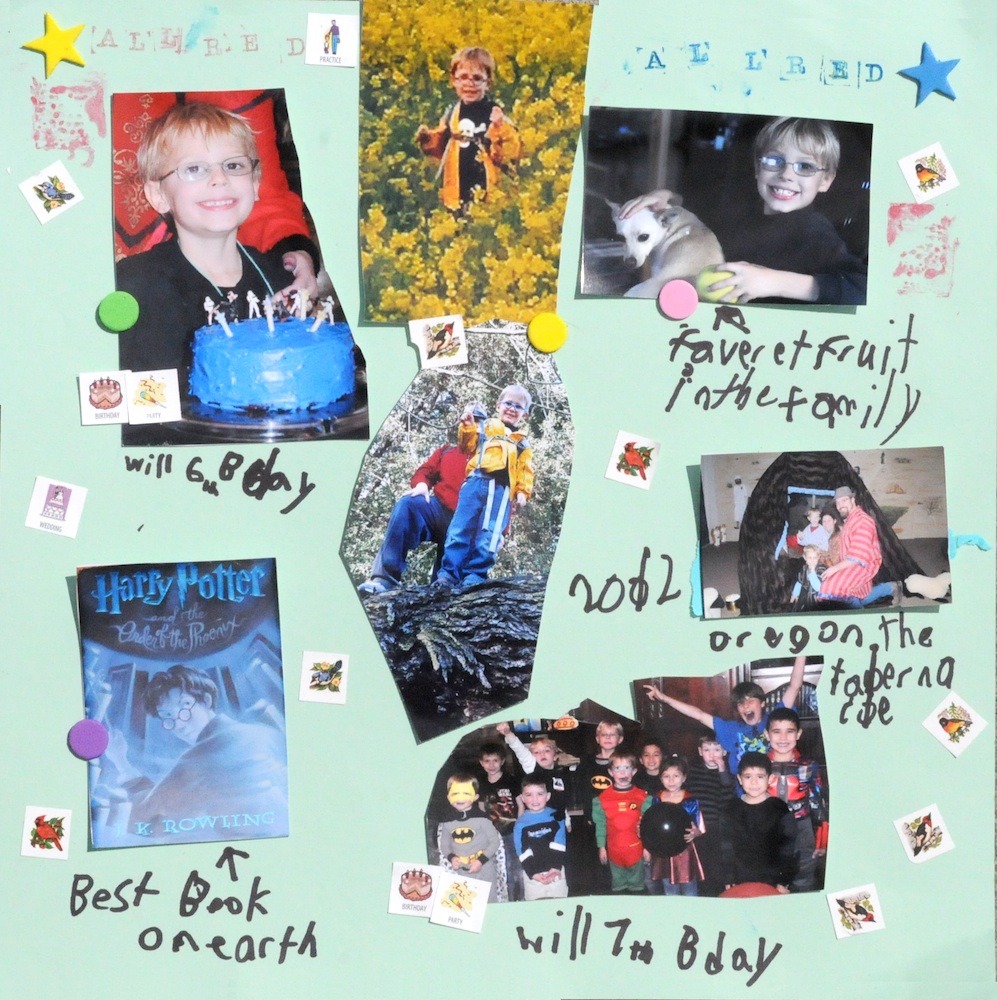
So a recent trend in scrapbooking is to put banners on a layout. Cute- yes. Overdone- yes. But you know what, will your kids care that you followed a trend in 20 years when they look through your album. So you can take that 2 ways, both ways are do what you want. You really only have you to please. And my choice is to jump on the bandwagon and play around with new trends and see if I like them. If not, no harm. If so, I have a new "go-to" in my bag of tricks.

Banners are so easy and add party to a page.

Here I hand cut some banner shapes from the pp. Then with my crop-a-dile (or any hole punch), I cut holes in them. I strong fiber through and glue dotted the fiber down. I then used a glue stick to stick on the paper banner portion. Lots of added color and fun.

For the next page, I also did the banner but in a more subtle way.
I just cut out random "banner" shapes for the lower right corner - all from random scraps of paper that I have saved in a "scrap" drawer. Then by overlapping and glueing down, I added some interest and color to a corner.

So go forth and try out a trend you see in a magazine, blog or website.
Misting? Distressing? Jewels? Washi Tape? New techniques and new products can add new life to not only one page but your whole creative process.

Thursday, February 23, 2012

ARTsy Fartsy

If you have kids, you have kids' artwork.
Kids love to create. And they don't want you to throw any of it away. I try to show them that I value their work and their creativity by including their art in THEIR pages. Because for me, the real goal of a scrapbook page is for my children to have a recorded record of their life and my love for them.

Here are some ways I've used their artwork. I hope it inspires you to also take their art and work with it or showcase it in your scrapbook pages.

Flat Logan

On this page I included 2 pieces of Logan's art.
First is a drawing that he drew on a piece of 8.5"x11" paper. I cut off the white edges that were empty so that it would fit better onto my page and allow for more room for scrapbook goodies.
Second, take a picture of your child holding artwork that is 3-Dimensional or too large to fit onto a scrapbook page. By including your child in the photo, it "dates" it at a glance and personalizes it too.

Random drawings

Again, just random drawings my son did. I silhouette cut them so that more would fit on a page. Here are mixed media- water colors, marker, pen, and pencil. But the focus is on his artwork because it is HIS album.

S is for Seashore

This artwork is more subtle but still there. I wanted a playful, random grouping of beachy items. In the random embellies, I added 3 stamped seahorse images my son made in art class. Adding something personal and handmade to a page makes it his own. Will he remember in 20 years that he made those stamped images? Probably not. Will I remember? I hope so.

Preschool Book Pocket

My son's preschool teacher gave us a book of his artwork progress throughout the school year. What a treasure to look back on later. So I left the book as is and created a scrapbook page with a large pocket to hold this gem. Now he can pull it out and look whenever he wants. What a kick it will be when he's 17 or even 37 years old! And it is still scrapbook sized for his 12x12 album.

William, 1st grade

For my son's first grade open house, he made this "self portrait" with a few random facts about himself. When I got to take it home, I couldn't wait to scrap it- still using the yellows and greens that he used and then adding playful touches like a name tag, some mini school pics (that I had extra) and a stitched on folded paper strip with tissue flower. Jazzy, no?

Their own thing

And whether or not your child is the next Monet, encourage him or her to do a scrapbook page with your leftover stickers, pictures, inks, etc. You might be surprised what they focus on.

Wednesday, September 21, 2011

Ribbon flowers

Want to make some ribbon flowers?


Supplies you need:
-Alene's Quick Dry Tacky Glue
-Creative memories circle punch (though you can free hand cut these as well)
- scissors
- scrap cardstock- coordinating color with ribbon
- Maya Road Trim Collection - Organza Roses Ribbon - Small - Turquoise - 1 Yard
- Pink Paislee - House of Three - Parisian Anthology Collection - Ribbon - Ruffled Darlings Strips


Let's go!
1- punch out circles of the cardstock. Best to use the same color as the ribbon you select incase any peaks through.
These will just be the base, so you can freehand cut them as well. I used the 1.5" circle cutter from Creative Memories.


2- Cut apart the organza roses to make centers. Cut off any excess fringe


3- Cut ruffled ribbon into approximately 6 inch strips.


4- Put glue in a ring around the outside of the circle.


5- Adhere ruffled ribbon to glue, leaving center empty.


6- Put glue in center and adhere previously cut center rosette.


7- if you buy enough supplies, you make loads of these!
Swap them. Put some on your own layouts and cards. RAK them.
Enjoy!

Monday, August 22, 2011

Flea Market Finds

My local scrapbook store has a flea market for scrappy stuff each year. I've gone and spent far too much for the last 3 years (maybe more) and been extremely happy with the deals I get each year. If you have surplus, you can sell your stuff for consignment (you get a certain percentage cash back, more if you accept store credit back). Anything that doesn't sell you get back. The store organizes it so well. Volunteers do all the hard work (and get to shop first).


This yearI spent just under $200 dollar and got 4 large bags and boxes of stuff.
The volunteers even went next door to CVS and got me a shopping cart to carry all my purchases to my car.


Here is my haul. There is soooo much, it is pretty hard to show in detail, but I did the best I could.
First paper. I love paper!!! Most packs/kits included some embellies too and ranged in cost from $1 to $3.


I also splurged and paid $8 each for these new Pink Paislee kits. Aren't they pretty??


I prefer Ring albums now, but since I'm prolific, I always need more albums.
So $5 each for some very new albums, even post bound is okay with me.


I totally get the idea of buying something to alter and then not doing anything with it.
These items were cheap because they are big and take up space. People want to get rid of them.
Although, not usually an altered items kind of scrapper, I have ideas for each of these for Christmas gifts.
The mugs were $0.50 each. The box .25. Three chipboard shapes that can be turned into door hangers .25.
The Family letters that can stand up- $2. The frame $2. The hanging album $2.
Months away and plenty of time and supplies. Now just to make them beautiful!


And second only to my love of papers is the embellishments that decorate them!


I may never have as many alphas as MindAy, but I'm stocking up.


Buttons


Ghost shapes, chipboard, journal stacks and stamps.
To note, lots of people were selling LOTS of stamps and chipboard. There was a huge supply but I too didn't need/want much of that.


Paint- Stickles, Mist, ink and some weird paper paint I thought I'd try out.
Note, there were 2 more Stickles in gold/brown that aren't pictured. I have already misplaced them. grrr


Some random stuff. Don't even know what those white plastic circles are but they were in a grab bag.


I love ribbon. I know Felt Fusion is out of vogue, but I loved it so stocked up. I don't have to be fashionable.


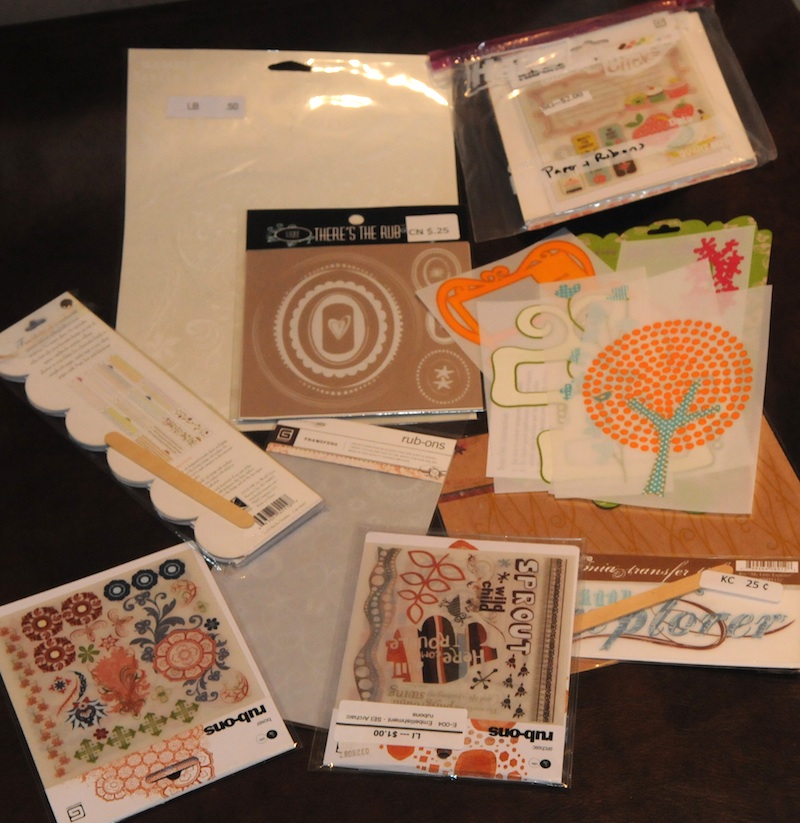
Rub-ons and iron ons


Transparencies


I'm a sticker junkie. And I'm okay with it.


One scrapper's junk, is now my treasure.
Maybe next year I'll purge and actually sell some of my stash. Maybe not! ;)
Off to put it all away now!

WTTS Crop 2011

Years ago, I met some scrapbookers online at scrapbook.com. We were all in a thread called the Very Laid Back Challenge with Cathy has our laid back leader. We started talking about wanting to crop together. Plans progressed and 4 years ago, the first "Will Travel To Scrap" crop was held. Although I was part of the WTTS, I couldn't get the funds together to make it. The next year, I saved up and attended in Michigan. I met women who I already adored online in person and found I adored them even more! And their scrapping talent- wow! No wonder so many are on Design Teams and featured artists. Last year I didn't make it, again due to money. So this year, hell or high water, I was going!

We met for a weekend in August in Somerset, Ohio (central to many of them).
Rebecca and her mom picked Jen (flying in from New York) and I up at the airport and drove us the hour to the B&B.
www.scrapbookohio.com


Although only 3 bedrooms, there was plenty of room for the 14 of us.
Two rooms slept 3 each, Genie slept downstairs on the futon in the "relaxation room" and I slept in a room with 6 single beds plus Jen on a blow up air mattress in the center. Honestly, I found it quite comfortable.
Here are some pics of the inside


And next door (as in sharing the same wall and able to go to in my socks and jammies!) was a scrapbook store with a very nice owner. The prices were quite good and the selection adequate. Better then I expected for such a small little shop.


But really it wasn't about the location, it was about the friends!


Missing: Melissa. She was probably downstairs working out!

And at the heart of the weekend- cropping!
It was so nice to just spend hours upon hours of scrap time!
And the generous girls brought so much! Cricut cartridges galore!


And the climax was definitely a very red cherry.

I was a bit amazed at Mindy's stash of Thickers. She seriously brought a store's worth and more.


Oh course, there were snacks and drinks.
Don't let the pics fool you, there was plenty of candy too.


Right next door to the scrapbook store was a German restaurant that we hit on Saturday night.
It was a blast! We had a great waiter too.


Then the short 3 days came to a close and we had to sweep up our scraps from the floor, pack our bags (did a few bring a wee too much?) and head home.


Until next year, we'll have these photos to scrap!